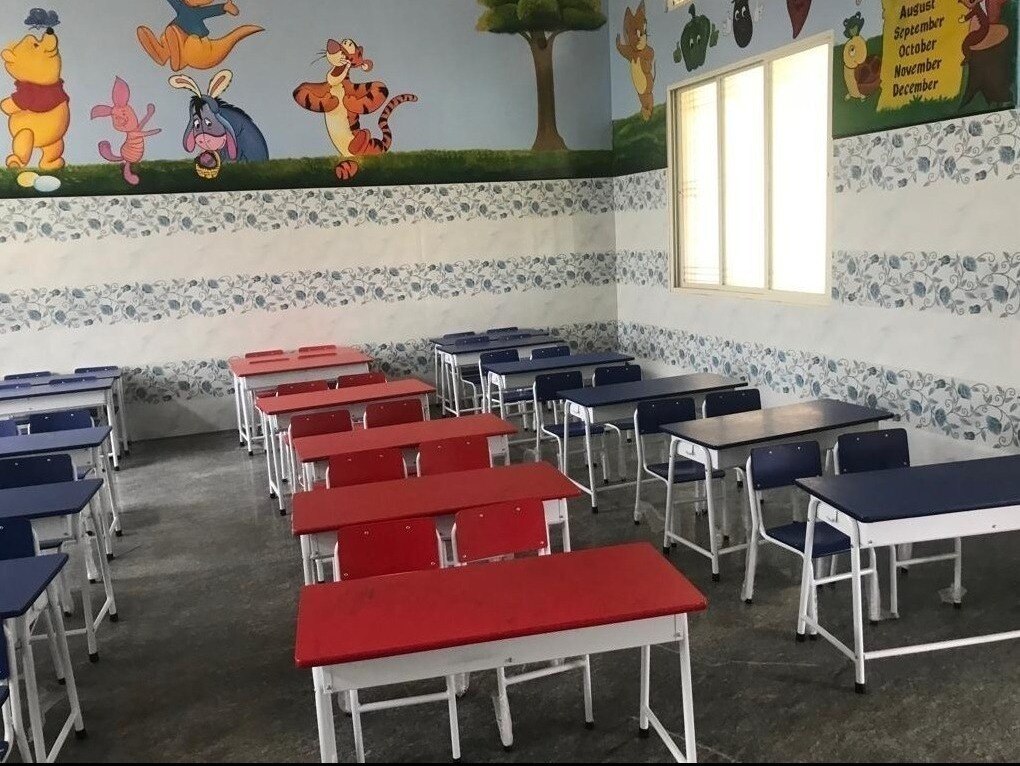
A damaged desk, chair or bench must be classified before anyone reaches for glue or paint. You will learn how to make it safe, decide between repair and replacement, check the finished work, and provide the measurements a supplier needs for an accurate match.
Key takeaways
- Remove furniture with loose joints, cracked seats, split tops or broken legs.
- Use wood filler for surface damage, not for cracked structural parts.
- Replace furniture when repairs cannot restore safe load-bearing strength.
- Check every repaired unit for wobble, sharp edges, exposed fasteners and moisture damage.
Triage the Damage and Remove Unsafe Furniture
Decide whether the damage is cosmetic or structural before the unit returns to use. A scratch, chipped finish, chipped laminate or replaceable edge strip is usually a maintenance issue. A loose joint, cracked seat, split tabletop, broken leg or damaged support member demands closer inspection.
1. Remove any desk, chair or bench that wobbles, tips, has sharp splinters, exposed screws or protruding nails. Withdraw a unit if a load-bearing member is cracked, or if the chair or bench shifts when a student leans or climbs.
2. Treat a split leg, stretcher, seat-support rail or back-support member as a safety fault, not a painting problem. Keep the item away from students until repair and inspection are complete.
3. Photograph the damage before moving the furniture, then mark it clearly as out of service. This record helps a supplier assessing wooden school furniture in Pune identify the failed part and compare repeated damage across rooms.
4. For water swelling, let the unit dry before judging it. Inspect the underside, leg ends, joints and concealed panel edges; a dry visible top can hide trapped moisture, fungal growth or weakened particleboard.
5. Treat termite holes, soft wood, frass and hollow-sounding sections as evidence requiring structural inspection. Unstable screws, bolts and brackets are a separate hardware fault: tighten them only after checking that the surrounding wood still grips the fastener.
Use the Right Repair for Wood, Joints and Moisture Damage
A loose joint needs to be opened, not hidden. Separate a mortise-and-tenon, dowel or screwed joint, remove dust and failed adhesive, and inspect the surrounding wood before choosing a repair.
- Reglue sound mating surfaces and clamp the joint until the adhesive cures.
- Replace a damaged dowel with a correctly sized dowel, or fit a tight wood plug into a stripped screw hole.
- Use a suitable replacement fastener; do not force a larger screw into weakened wood.
- Replace a cracked seat board or split tabletop when it no longer holds fasteners.
- Sand splinters with progressively finer abrasive, round sharp edges, seal bare wood and repaint only after the surface is dry and sound.
| Repair choice | Use it when | Do not use it to hide |
|---|---|---|
| Reglue and clamp | The wood is sound and the joint fits tightly | A leg or rail is cracked |
| Dowel, plug or fastener replacement | The joint is intact but its connector or hole has failed | Surrounding wood is crushed or soft |
| New panel or component | Particleboard or fibreboard has swollen, delaminated or lost screw-holding capacity | A filler or thick paint layer cannot restore strength |
Moisture causes swelling, shrinkage, cupping, open joints and split coatings. Fix the leak or harsh cleaning practice, then inspect wooden school furniture in Pune after drying, including undersides, leg ends, joints and concealed panel edges.
Acclimatise replacement timber or panels inside the building before machining and assembly. If mould is present, clean and dry structurally sound material only after removing its moisture source; heavily contaminated porous or swollen parts require removal rather than paint.
Choose Repair or Replacement by Structural Risk and Remaining Life
Replace the damaged component when a leg, stretcher, seat-support rail or back-support member is split through its section, crushed around a fastener, badly decayed, or unable to hold a joint under load. Repair a scratch, chipped finish, replaceable edge strip or sound joint when the structural wood remains intact.
| Damage | Better decision | Reason |
|---|---|---|
| Split load-bearing member | Replace the component | Patching will not restore reliable strength |
| Sound joint with loose adhesive | Repair the joint | The surrounding wood still holds fasteners |
| Water-swollen panel with delamination | Replace the panel or unit | Lost screw-holding capacity will return as a failure |
| Repeated failures across many units | Compare full replacement | The same defect creates a continuing safety and maintenance risk |
Compare repair labour and materials with the price of a compatible component, the unit’s remaining service life and the number of affected desks or benches. Repairing ten identical units in one batch can cost less time than buying ten replacements; repeated failures across a large set can make complete replacement the safer decision.
For wooden classroom furniture for repair replacement, record the original seat height, desk height, tabletop depth, bench width, material thickness, joint type and hardware. A similar-looking leg or top can alter stability, knee clearance, writing height and centre of gravity.
Ask a wooden school benches manufacturer how the part restores the original load-bearing construction, not just how closely its finish matches. Treat customized units separately: a generic part that fits old screw holes can still give students the wrong dimensions.
Inspect Every Repaired Desk or Bench Before Releasing It
Release a repaired desk or bench only after it stays stable on its intended floor, under repeated loading, without reopening joints, tipping, sharp parts or loose hardware.
1. Place the unit on its normal classroom surface and press down from each corner. Any rocking, twisting or uneven leg contact fails the check; adjust levelers without leaving one leg unstable.
2. Apply firm hand pressure to every repaired joint. Look for movement, separation and fresh cracks, then check that each screw, bolt, nail and bracket sits tight without protruding or crushing the wood.
3. Run your hand over the seat, tabletop, back support and all edges. Stop the release if you find splinters, sharp corners, exposed fasteners or a finger-trapping gap created by the repair.
4. Apply a controlled load suitable for the unit’s design, then repeat the corner rocking test and joint-pressure check. Never use a student as a load test. Push the desk or bench from normal use positions; it must not tip or shift.
5. Inspect repaired paint or sealant for tackiness, peeling and exposed wood. A coating that transfers to your hand, lifts at an edge or leaves bare wood needs correction before use.
6. Record the inspection date, repair performed, responsible person and pass or fail result. Keep failed units out of service until corrected, and use these records to trace recurring failures to a room, batch or component.
Give the Supplier the Measurements Needed for a Safe Match
Send the furniture type, quantity, room, age, damage photographs and whether the unit is customized. Record the original dimensions before ordering: overall size, seat height, desk height, tabletop depth, bench width, leg spacing, material and panel thickness.
- Describe the joint type, hardware, floor levelers, edge treatment, colour, laminate or paint finish, and every accessory that must remain compatible.
- Ask for a drawing or sample stating finished dimensions, tolerances, edge radii, load-bearing construction, surface finish, replacement-part availability and warranty exclusions. Require the quotation to separate solid timber, plywood, blockboard, particleboard, laminate, edge treatment, adhesive, finish system and hardware. “Wooden” does not tell you how a panel handles wet cleaning or repeated fastener removal.
Match the proposed option to the room rather than choosing a generic adult-size unit.
| Option | Check before approval | Risk if mismatched |
|---|---|---|
| Component repair | Existing seat-to-desk relationship, legroom, joint strength and centre of gravity | A visually neat repair can still leave the unit unstable |
| Matched replacement | Finished dimensions, floor levels, aisle spacing and student age group | A similar-looking leg or top can alter writing height and knee clearance |
| Complete set | Layout, quantity, accessories and user dimensions | A new set can disrupt circulation or create uneven desk heights |
A classroom furniture supplier in Pune such as Kohinoor School Furniture can use these records to judge whether repair, a matched part or a complete set is safest. Ask for written confirmation that the replacement matches the furniture already in the room. Use the same scrutiny when comparing high quality classroom furniture in Pune.
Related products
 | Color Pink and White Material Wooden and MS Size Customized Design Type Customized We are offering School Class Wooden Furniture to our clients. View product → |
 | Being one of the leading manufacturers and suppliers of this commendable range of School Wooden Desk, we work hard to maintain its quality. View product → |
Frequently asked questions
How do you decide whether damaged wooden classroom furniture is unsafe?
Separate cosmetic damage from structural damage. Remove units with loose joints, cracked seats, split tabletops, broken legs or damaged support members until inspected.
Which repair is suitable for damaged wooden desks and benches?
Use finish repairs, edge-strip replacement or wood filler for cosmetic damage. Repair or replace cracked structural parts, loose joints and moisture-weakened components.
When should you replace damaged wooden classroom furniture instead of repairing it?
Choose replacement when the frame cannot regain safe load-bearing strength, moisture has weakened the wood, or repeated repairs have shortened its remaining service life.
What should you inspect before returning a repaired desk or bench to use?
Check stability, joint tightness, load-bearing parts, sharp edges, splinters, exposed fasteners, damaged laminate, moisture marks and correct alignment.
What measurements should you give a classroom furniture supplier for a safe replacement?
Provide seat and tabletop height, tabletop length and width, seat depth, frame dimensions, leg spacing, storage requirements and photographs of the damaged unit.
Related products
 | Color Blue Design Type Customized Material Wooden, MS We are offering Wooden School Furniture to our clients. View product → |
 | School Furniture Use Classroom Color Brown Size Customized Design Type Customized Material Wooden and SS We are offering Nursery Classroom Furniture to our clients. View product → |
 | Size Customized Color Blue Design Type Customized Material Wooden We are offering School Furniture to our clients. View product → |
 | Product Details: Size Customized Color Cream Design Type Customized Material Wooden Weight 5-6 kg We are offering Pre-Primary School Furniture Set to... View product → |